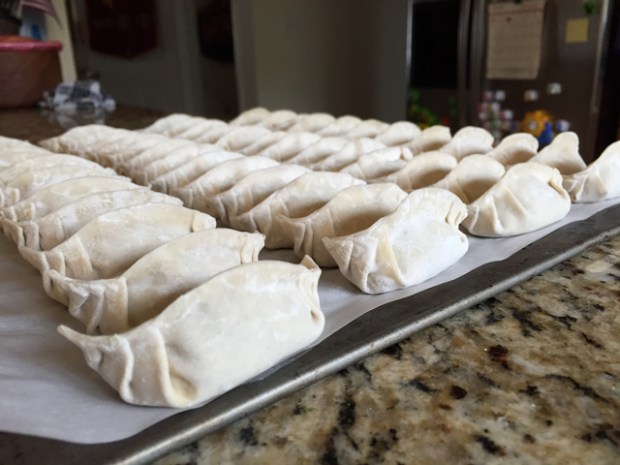
Mom’s Pork & Cabbage Dumplings
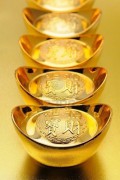
If someone asks me what I would eat as my last meal on earth, I would respond “dumplings” without any hesitation. The Chinese dumpling has a long history and is intertwined with Chinese history and with Taoism. Dumplings are always eaten on important holidays such as Chinese New Year, Festival of the Dead, and other Taoist holidays, and they are given as offerings to Gods, friends, and neighbors alike as a gesture of goodwill and hospitality. Even gold ingots used in many Asian countries are shaped like dumplings, and is often portrayed as being held by the Deities of Prosperity and Happiness (aka the Laughing Buddha). That is how much we value our dumplings!
Of course back in the old days, dumplings were made by hand, and it was an opportunity for the older generation to spend time with their children. That is how I learned to make dumplings. My mom started teaching me how to wrap dumplings as a child, and mine would always look terrible compared to my mom’s. But as I grew and had more experience making them, my dumpling wrapping skills improved, and so did my conversations with my mom. It is a bonding experience that I now share with my two little ones, and a tradition that I hope they will carry forward.
Nowadays you can just buy frozen dumplings at any grocery store, and they are usually pretty good. But when I have a couple of hours to make dinner, or if I need a quiet activity to do with my kids, making dumplings by hand is my go to.
With all that said, however, I do take shortcuts. For example, I don’t make my own dumpling skins (gasp!), I buy the pre-packaged kind from the store. Now, before you start call me names, let me tell you why. Freshly made dumpling skins are usually too thick and doughy for my liking, and tends to take the attention away from the filling. So I prefer very thin, almost translucent gyoza skins that cooks up very slippery and light, and allows the filling of the dumpling to really shine. Also, I don’t like that “wet dough” texture that usually resides on the inner side of dumpling skins that are made too thick and did not have enough time to develop. Also, freshly made dumpling wrappers are much more difficult to handle – they are stretchy and too soft, making it more difficult to make uniform sized dumplings. In today’s carb-aversed world, I think that my dumplings offer up a much better punch of protein than dumplings that have thicker skins.
Secondly, I use food processors and blenders to do my chopping for me, I don’t do this by hand. You get more uniform cuts of vegetables this way, and you don’t end up with pointy pieces of cabbage that ends up piercing your dumpling skin and ruins the whole thing.
What I DO take my time on is wrapping the dumplings as perfectly and uniformly as possible. I know, to some, this sounds ridiculous, but it really makes a difference in taste, presentation, and various ways one can cook the dumplings. As such, I will spend the bulk of this blog describing how I wrap my dumplings.
Tools needed:
- 1 large mixing bowl
- 1 small bowl half filled with cold water
- 1 teacloth, moistened with warm water
- chopsticks or medium spoon
- 2 cookie sheets or cutting boards that can lay flat on the freezer shelf
- Parchment paper or flour to sprinkle on your cookie sheet or cutting board
You will also need:
- Room in your freezer large enough to fit your cookie sheet
- Kitchen scale if you have one (optional)
- Scissors
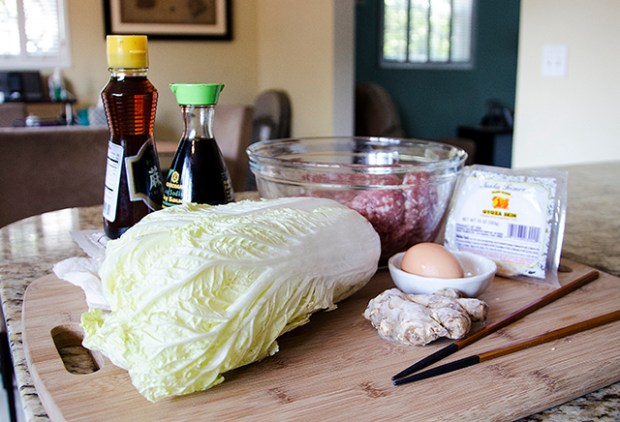
Ingredients
These ingredients will yield approximately 100 dumplings, which is about 2 meals worth of dumpling in my 4-person household.
- 2 lbs of cold, fresh ground pork – the fattier the meat, the better the dumpling filling will bind together
- 1 small to medium head of Napa Cabbage, enough to make 4 to 6 cups of finely chopped cabbage
- 2 packages of store bought, refrigerated, ROUND dumpling wrappers. My favorite brand is Nanka Seiman’s round gyoza skins because they are the thinnest, but other brands of dumpling skins will do as well. Each package of will contain about 50 wrappers.
- 1 spring onion stalk, finely chopped.
Note: for a stronger “oniony” taste, substitute spring onions with finely chopped leeks - 1 large handful of cilantro leaves, finely chopped
- 2 Tbsp Soy Sauce
- 2 Tbsp Sesame Oil
- 1/4 tsp of minced fresh ginger
- 1 beaten egg, optional – Use an egg as a binder if the ground pork is very lean or not fatty enough
- salt and pepper, to taste
Procedure
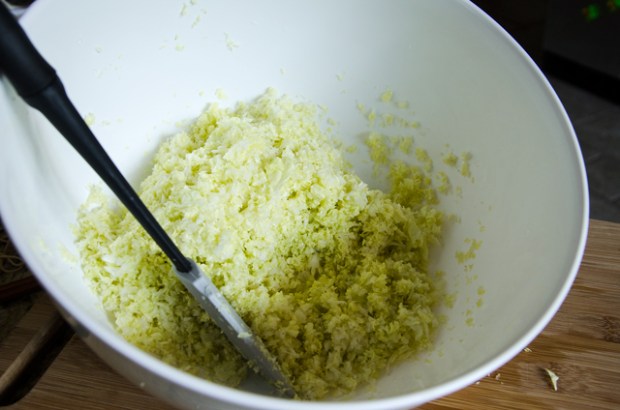
- Finely chop the Napa cabbage using a food processor or by hand. End result should look like the picture below. Make sure there are no hard, pointy pieces or cabbage, as it will pierce the delicate dumpling wrapper and ruin all of your hard work!
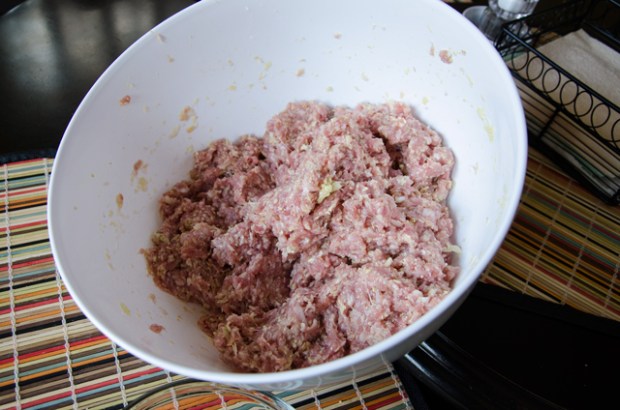
- In a large mixing bowl, combine ground pork, napa cabbage, cilantro, and green onions (or leeks), and mix well. Fold soy sauce, sesame oil, ginger, garlic (optional), salt and pepper (optional) to the mixture, With clean or plastic-gloved hands, try to make a “meatball” with approximately 1/2 ounce of the mixed filling. If the filling sticks together well, then proceed to wrapping. If the filling does not stick together well, then add splashes of the beaten egg to the filling, knead it into the filling, and try again. Add enough egg until you can make a cohesive meatball.
- Open your package of dumpling wrappers as pictured below. The wrappers dry out quickly, so cover your package of wrappers with a wet paper towel or teacloth in order to keep them in a moist environment throughout the next couple of hours. Place the package of wrappers on one end of your work area

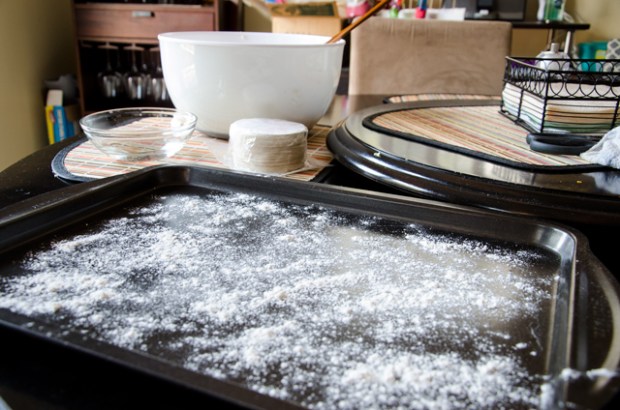
- Line your cookie sheet or cutting board with parchment paper or sprinkled flour and place it at the other end of your work area.
- Place a dumpling wrapper on your workspace, or hold it flat in your hand. With a pair of chopsticks or a spoon, scoop a small dollop (you can use your kitchen scale to weigh about 1/4 to 1/2 ounce per dollop) of filling into the middle of the wrapper.

- Wet you index finger in the water bowl, and trace you wet fingertip around the circumference of the dumpling wrapper. We do this to make the edge of the dumpling wrapper slightly sticky for the next step.

- Fold one edge of the wrapper over the filling and match up the edge with the other side, creating a semi-circle. Gently press together ONLY the top of the semi circle shape, DO NOT press together the two sides (see picture)

- Pick up the dumpling and place it in your non-dominant hand so that the filling is sitting in the middle of my palm, and the top of the semi circle is standing up. (since I’m right handed, I place the dumpling in my left hand).
- Looking at the face of the semi circle shape, wet the index finger of your free hand and wet the outer edge of the backside of the semi circle.

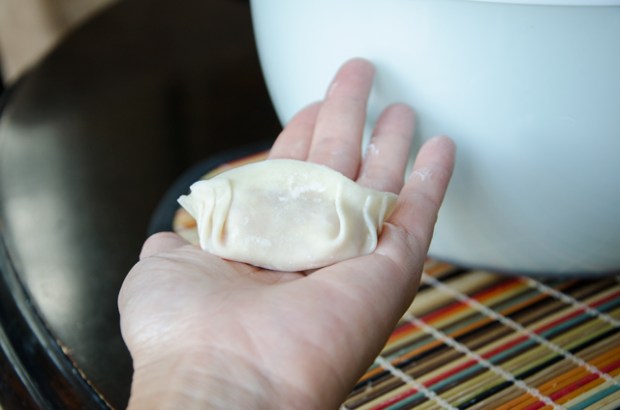
- Using your thumb and index finger, gently push up the open end of the wrapper, make a small pleat, and press the pleat against the wetted outer edge of the wrapper.


- Repeat this pleating action three times on each side of the dumpling. When you have finished pleating, pinch the entire edge of the dumpling together to form a complete seal, double check to make sure there are no holes in your seal.
- Place the finished dumpling on the parchment lined surface, and make your next dumpling. Do not let the finished dumplings touch each other, the skins will stick together and tear when you try to separate them!
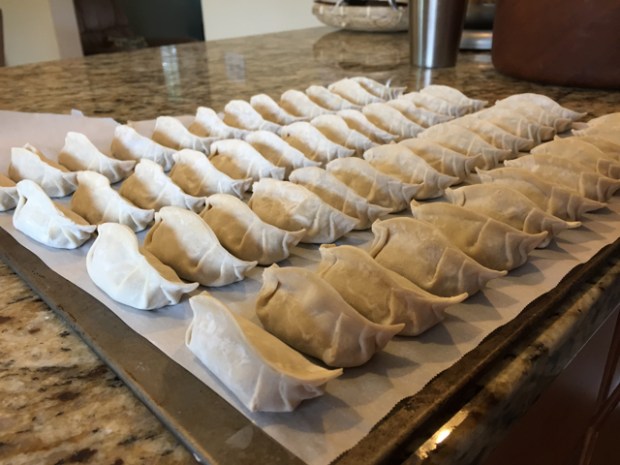
- When you have filled up a sheet with dumplings, place the entire sheet into the freezer and freeze for an hour. The freezing of the dumplings helps the wrapper to shrink around the filling and promote cohesion, and it allows the filling to freeze a little bit so as to release some of the moisture into the wrapper, causing the dumplings to taste juicy when cooked.
- Once the dumplings are frozen, remove them from the parchment carefully and store in the freezer in a freezer bag.
Voila! You have made dumplings! Now you have a variety of ways to cook and serve you dumplings, including boiling, steaming, and pan frying. I will post instructions on how to cook your dumplings soon, but in the meantime, just email me if you need to know how.

The dumplings look so beautiful! I’m gonna have to crank some out next weekend.
I hope your dumplings came out nice! Thanks for commenting on my post!
They look perfect!!! Great wrapping tips 🙂
thank you! and feel free to repost!